Plesk is a popular web hosting control panel that offers a range of tools to manage websites, email accounts, and more. One of its key features is the ability to create and manage email accounts for domains hosted on your server. In this guide, we’ll walk you through the step-by-step process of creating email accounts in Plesk, allowing you to manage professional email addresses for your domain easily.
Table of Contents
Why Create Email Accounts in Plesk?
Creating an email account in Plesk is essential if you want to set up professional email addresses for your domain, such as yourname@yourdomain.com. Having a custom email domain adds credibility to your business, increases brand recognition, and allows for better management of communication.
By using Plesk’s interface, you can create and manage multiple email accounts, set up quotas, change passwords, and configure various email services like forwarding and autoresponders.
Prerequisites:
Before you start, ensure that you have:
- Access to your Plesk control panel.
- A domain name set up in Plesk.
- Enough hosting resources to create new email accounts.
Step-by-Step Guide to Creating Email Accounts in Plesk
Step 1: Log in to Plesk
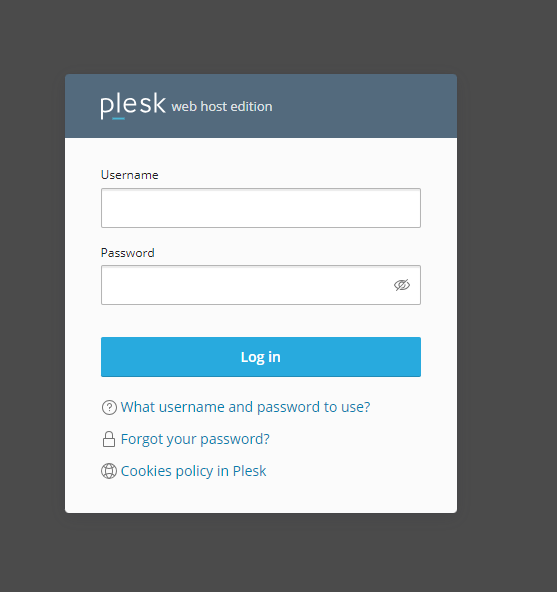
The first step is to log into your Plesk control panel:
- Open your web browser and go to the Plesk login URL, typically something like
https://yourdomain.com:8443. - Enter your username and password provided by your hosting provider, then click Login.
Step 2: Navigate to the Mail Section
Once logged in, follow these steps to access the email management section:
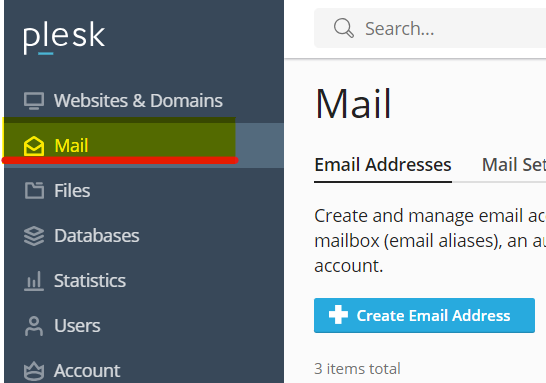
- From the Plesk dashboard, find and click on Mail from the left-side navigation menu.
- In the Mail section, you’ll see a list of any existing email accounts for your domain.
Step 3: Select Your Domain
If you manage multiple domains, make sure you select the domain for which you want to create a new email account:
- At the top of the Mail section, you’ll see a dropdown or a list of domains.
- Choose the domain for which you want to create the email account.
Step 4: Create a New Email Account
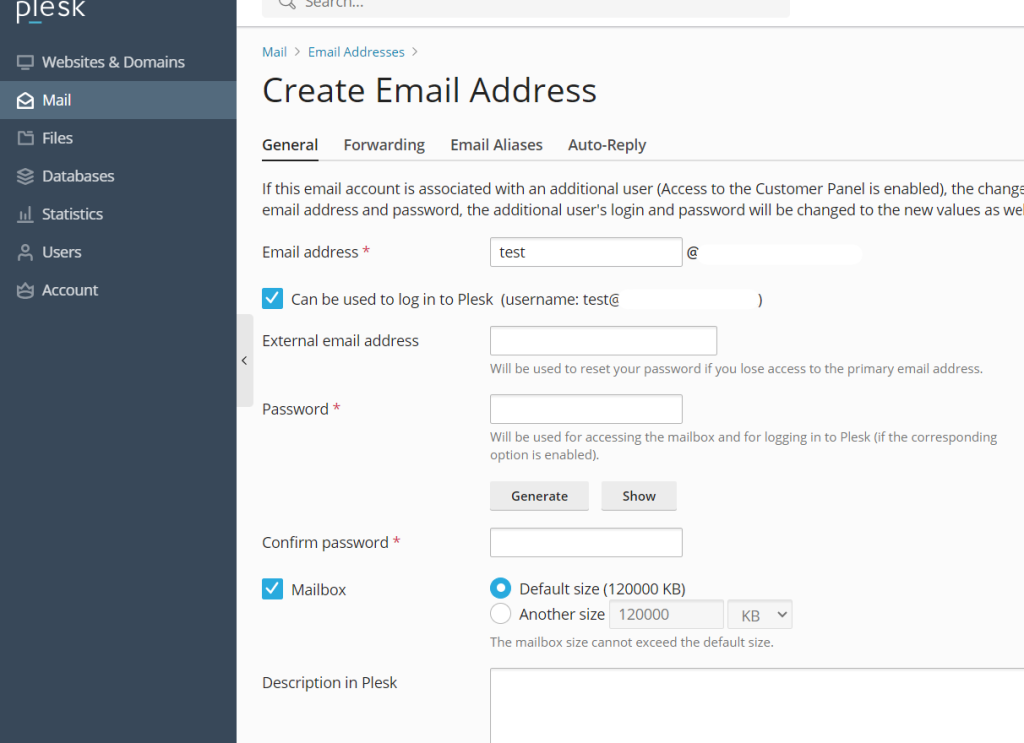
Now that you’re in the Mail section for your domain, follow these steps to create a new email account:

- Click the Create Email Address button.
- Fill in the required details:
- Email Address: Enter the email address you want to create (e.g., john@yourdomain.com).
- Password: Set a secure password or use the Generate button to let Plesk create a strong password for you. Make sure to note the password or save it in a password manager.
- If you want to set up a mailbox quota, specify the maximum storage limit for the account. If not, you can leave this field as unlimited.
Step 5: Advanced Settings (Optional)
Plesk offers additional settings you can configure when creating an email account:
- Access to the Control Panel: If you want the user to have access to the Plesk control panel (for example, to manage their own email account), you can enable this option.
- Redirect to Another Email: You can set up email forwarding by redirecting incoming emails to another address.
- Autoresponder: Set up an automatic reply to emails when the user is unavailable, such as for vacation responses.
Step 6: Save and Complete
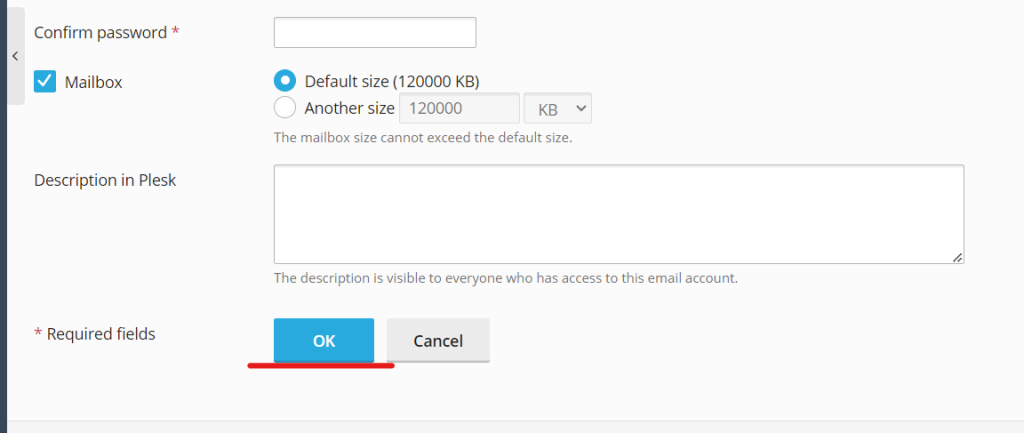
After entering all the required details, click OK or Save to create the email account. The new email address will now appear in the list of accounts under the Mail section.
Step 7: Access Your New Email Account
To access the newly created email account, you can either use Webmail or set up the account in an email client like Outlook or Thunderbird.
Access via Webmail:
- In your browser, go to the Webmail login page, usually
https://webmail.yourdomain.com. - Enter your newly created email address and the password you set earlier.
- You will now be able to send and receive emails using Webmail.
Set Up in an Email Client:
- Open your email client (e.g., Outlook, Thunderbird).
- Add a new email account by entering the email address and password.
- Plesk will provide you with the server details (incoming and outgoing mail server) needed for configuration. These are usually in the format of
mail.yourdomain.com.
Managing Email Accounts in Plesk
After creating the email account, you can easily manage it within Plesk. Here’s what you can do:
Change Password
If you need to change the email account’s password, simply:
- Go to the Mail section in Plesk.
- Click on the email address you want to update.
- Enter a new password in the Password field and click OK.
Set Quotas
You can adjust the storage limit of any email account by:
- Selecting the email account from the Mail section.
- Changing the value in the Mailbox size field to a desired quota or setting it to unlimited.
Delete an Email Account
If you no longer need the email account, you can delete it by:
- Going to the Mail section in Plesk.
- Selecting the checkbox next to the email account you want to delete.
- Clicking Remove and confirming your choice.
Enable/Disable Autoresponders
To set up automatic responses (such as out-of-office replies), follow these steps:
- In the Mail section, click on the email address.
- Go to Autoresponders, and set your message.
- You can enable or disable the autoresponder depending on your needs.
Common Issues When Creating Email Accounts in Plesk
Email Quota Exceeded
If you’ve set a quota for your email account and the mailbox becomes full, the account won’t be able to receive new emails. To resolve this:
- Increase the quota in the Mailbox size field in Plesk.
- Delete old or unnecessary emails to free up space.
Incorrect Server Settings for Email Client
If you’re having trouble setting up your email account in an external email client, double-check the incoming and outgoing mail server settings. These details are typically found in Plesk or can be provided by your hosting provider.
Password Issues
If the user forgets their email password, you can easily reset it from the Plesk Mail section by editing the email account.
Conclusion
Creating email accounts in Plesk is a straightforward process that allows you to set up professional and reliable email addresses for your domain. By following the steps in this guide, you can quickly create, manage, and configure email accounts for yourself, your business, or your clients. Whether you need basic email functionality or more advanced options like autoresponders and forwarding, Plesk makes it easy to manage all your email needs from one place.