Securing your website with an SSL certificate is essential for ensuring that data exchanged between your site and its visitors is encrypted and secure. Plesk, a popular web hosting control panel, makes it easy to enable free SSL for your domain. In this guide, we’ll walk you through the step-by-step process of enabling free SSL on your Plesk Control Panel.
Table of Contents
What is SSL and Why is it Important?
SSL (Secure Socket Layer) certificates encrypt data exchanged between your website and its users, ensuring the security and privacy of information like login credentials, payment details, and personal data. Additionally, SSL certificates improve search engine rankings and add a layer of trustworthiness to your site by displaying a padlock in the browser’s address bar and allowing your website to be accessed over HTTPS.
Benefits of Using Free SSL
With the rise of security awareness, most hosting providers offer free SSL certificates via services like Let’s Encrypt. The benefits of using free SSL include:
- Cost-effective: Free SSL certificates offer encryption without the need to purchase expensive certificates.
- Simple Setup: Most control panels, including Plesk, offer a straightforward process for enabling SSL.
- Automatic Renewal: Free SSL services like Let’s Encrypt automatically renew the certificate before it expires.
- Increased Trust: A secure website gives your users confidence, leading to improved trust and potentially better user engagement.
Prerequisites for Enabling Free SSL
Before you begin, make sure you meet the following prerequisites:
- You have access to the Plesk control panel.
- Your domain is properly set up and points to your Plesk server.
- Your hosting plan supports SSL certificates.
Now, let’s walk through how to enable a free SSL certificate in the Plesk Control Panel.
Step-by-Step Guide to Enabling Free SSL in Plesk Control Panel
Step 1: Log into Plesk
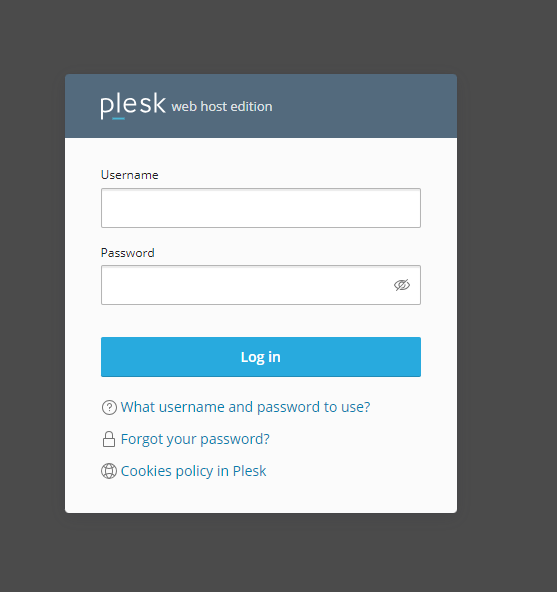
- Open your browser and enter the URL for your Plesk control panel (usually something like
https://yourdomain.com:8443). - Enter your username and password to access your Plesk dashboard.
Step 2: Navigate to the “Websites & Domains” Section
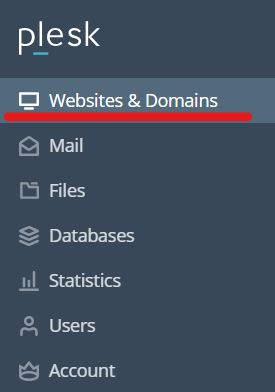
- Once logged in, look for the Websites & Domains section in the Plesk dashboard. This is where all domain-related settings are managed.
- Find the domain for which you want to enable SSL and click on it.
Step 3: Access the SSL/TLS Settings
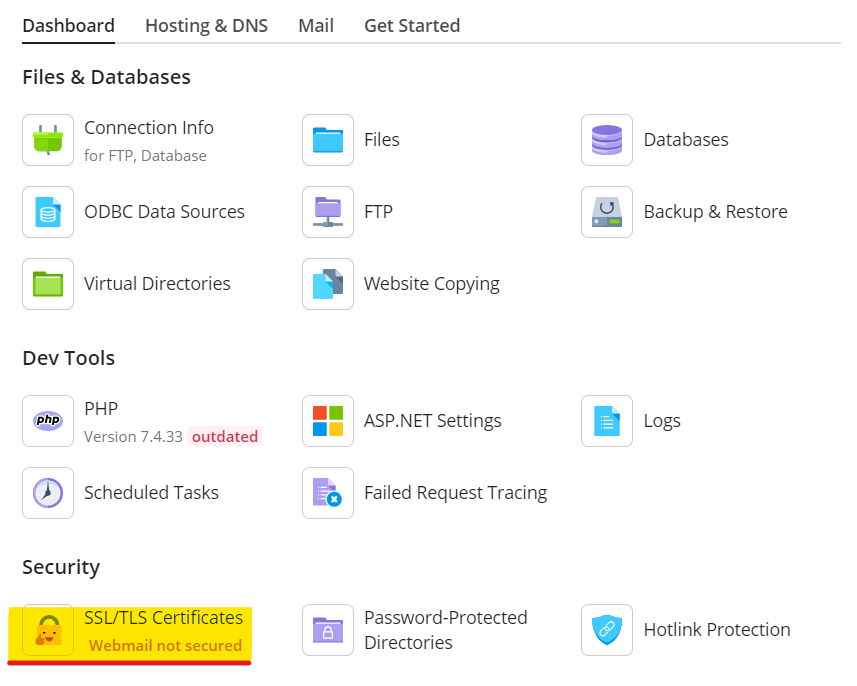
- Under the selected domain, scroll down until you see the Security section.
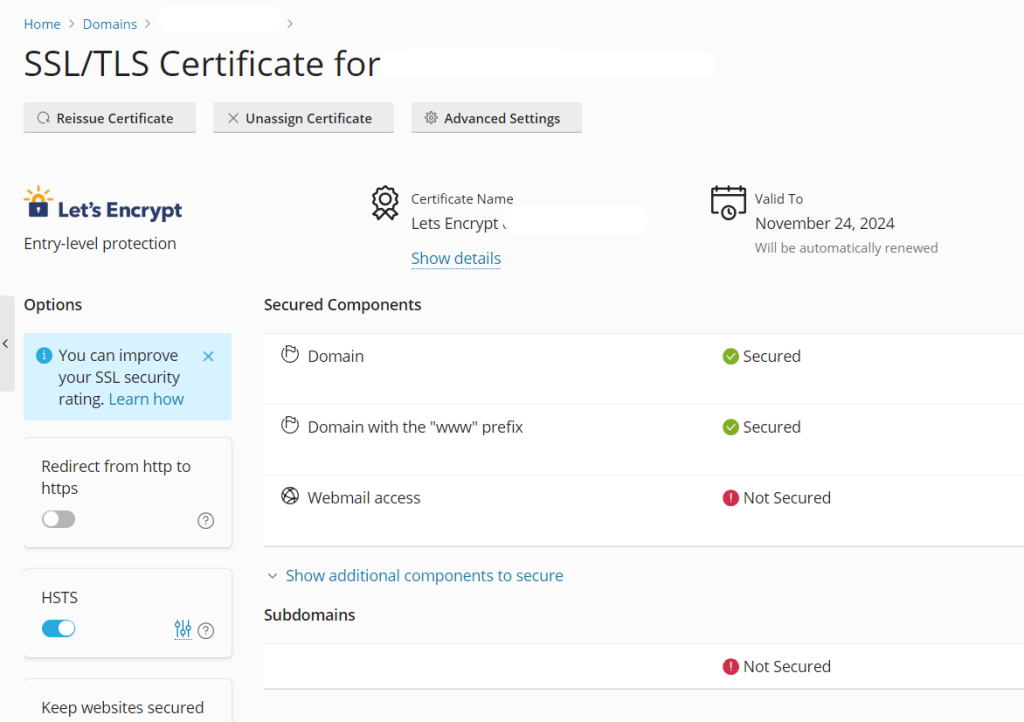
- Click on the SSL/TLS Certificates option. This is where you’ll manage all SSL-related settings for your domain.
Step 4: Select “Let’s Encrypt”
- In the SSL/TLS Certificates section, click the Get it free button next to the Let’s Encrypt option.
- This will take you to the Let’s Encrypt setup page, where you can enable the free SSL certificate for your domain.
Step 5: Configure Let’s Encrypt SSL
- In the Let’s Encrypt configuration page, verify that your domain name is correct.
- You can also choose to secure your domain with www and non-www versions. If you want to cover both, make sure the options are selected.
- Optionally, you can also choose to secure your mail domain (e.g.,
mail.yourdomain.com), ensuring that your email communication is also encrypted.
Step 6: Install the SSL Certificate
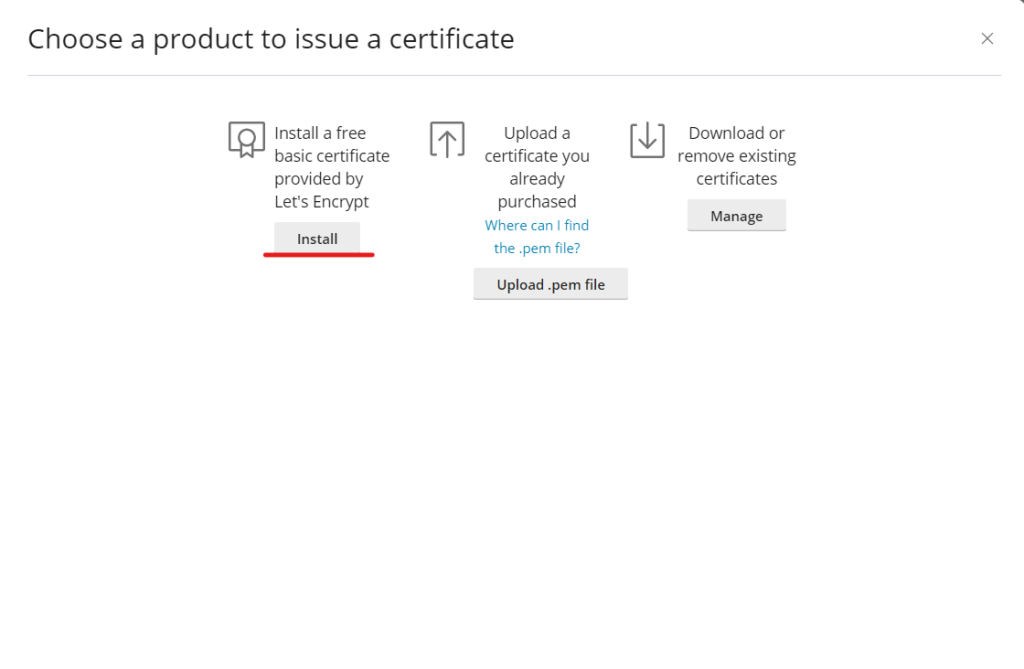
- Once you’ve verified all settings, click the Install button.
- Plesk will now handle the process of requesting, validating, and installing the Let’s Encrypt SSL certificate.
- After a few moments, the SSL certificate will be successfully installed on your domain.
Step 7: Enable HTTPS Redirection (Optional but Recommended)
To ensure that all traffic to your website is encrypted, you should redirect all HTTP traffic to HTTPS:
- Go back to the Websites & Domains section.
- Click on Hosting Settings for your domain.
- In the Hosting Settings page, check the box labeled Permanent SEO-safe 301 redirect from HTTP to HTTPS.
- Click OK to save the settings. Now, all visitors to your website will be automatically redirected to the HTTPS version.
Step 8: Verify SSL Installation
Once you’ve installed the SSL certificate, it’s important to verify that it’s working correctly:
- Open a browser and type your domain with https:// in front (e.g.,
https://yourdomain.com). - If the installation was successful, you should see a padlock icon next to the URL, indicating that the connection is secure.
You can also use online SSL verification tools like SSL Labs to ensure that your certificate is properly installed and functioning as expected.
Managing and Renewing SSL Certificates in Plesk
Let’s Encrypt SSL certificates are valid for 90 days but are automatically renewed by Plesk as long as the domain and hosting account remain active. However, if you want to manage or check the status of your SSL certificate, you can always revisit the SSL/TLS Certificates section under your domain.
Troubleshooting SSL Issues
- DNS Propagation Delay: After installing the SSL, if the secure connection isn’t available right away, it could be due to DNS propagation. Wait a few hours and try again.
- Certificate Not Covering All Subdomains: Ensure that you selected both www and non-www versions of your domain during the Let’s Encrypt configuration.
- SSL Renewal Issues: If Plesk isn’t renewing the SSL certificate automatically, it could be due to a misconfiguration or expired domain. Check the domain’s status and retry.
Conclusion
Enabling free SSL in Plesk is a quick and effective way to secure your website. Whether you’re using a basic shared hosting plan or managing multiple domains on a dedicated server, Let’s Encrypt offers a cost-effective solution to enhance your site’s security and trustworthiness. By following the steps in this guide, you’ll be able to easily enable SSL for your domains and ensure that your visitors’ data is protected.
SSL encryption not only boosts your website’s security but also improves SEO rankings and helps build trust with your audience. So, if you haven’t already enabled SSL on your website, now is the perfect time to do so!